
Installation and Maintenance Tips for Long-Lasting Wooden Flooring
Installation and Maintenance Tips for Long-Lasting Wooden Flooring


Choosing the Right Type of Wood
Selecting the appropriate wood species is crucial for the longevity of your wooden flooring. Different types of wood offer varying levels of durability, aesthetic appeal, and suitability for specific environments. For instance, hardwoods like oak, maple, and cherry are highly durable and resistant to wear and tear, making them ideal for high-traffic areas. On the other hand, softer woods like pine may be more prone to dents and scratches but offer a rustic charm that can be appealing in less frequented spaces.
When it comes to aesthetic appeal, the grain pattern, color, and texture of the wood can significantly impact the overall look of your flooring. Oak, with its prominent grain and wide range of finishes, is a popular choice for both traditional and contemporary settings. Maple, known for its fine grain and light color, provides a sleek, modern look. Cherry wood, with its rich, reddish hue, adds warmth and elegance to any room.
In addition to solid wood, engineered wood is another option worth considering. Engineered wood consists of a top layer of real wood veneer bonded to multiple layers of plywood or high-density fiberboard. This construction makes engineered wood more stable and less susceptible to changes in temperature and humidity, making it suitable for environments like basements or areas with fluctuating moisture levels. While solid wood can be sanded and refinished multiple times, engineered wood typically has a limited number of refinishing options due to its thinner top layer.
Each type of wood comes with its own set of advantages and disadvantages. Solid wood, for instance, offers a timeless, authentic look and can last for decades with proper care. However, it can be affected by moisture and temperature changes. Engineered wood, while more stable, may not offer the same longevity as solid wood but provides greater versatility in installation and design.
Ultimately, choosing the right type of wood for your flooring involves balancing durability, aesthetics, and environmental suitability. By carefully considering these factors, you can make an informed decision that ensures the longevity and beauty of your wooden flooring.
Preparing the Subfloor
Proper subfloor preparation is essential to ensure the successful installation and longevity of wooden flooring. The first step in this process involves a thorough inspection of the subfloor. Start by checking for any structural damages or weaknesses that could compromise the flooring. Any signs of rot, mold, or termite damage should be addressed immediately before proceeding with the installation.
Once the subfloor is inspected and deemed structurally sound, the next step is cleaning. Remove all debris, dust, and adhesive residues to create a clean surface. This can be achieved using a vacuum cleaner, followed by a damp mop to ensure no particles remain that could interfere with the adhesion of the wooden flooring.
Leveling the subfloor is another critical step in preparation. Uneven surfaces can lead to significant issues such as gaps, squeaks, and uneven wear over time. Use a straightedge to identify any high or low spots. High spots can be sanded down, while low spots can be filled with a leveling compound. Ensure that the subfloor is as flat as possible within the tolerances specified by the flooring manufacturer.
Moisture testing is a crucial part of subfloor preparation, as excess moisture can cause wooden flooring to warp, buckle, or cup. Utilize a moisture meter to measure the subfloor's moisture levels. For concrete subfloors, the moisture content should not exceed 4%, while plywood subfloors should be below 12%. If moisture levels are too high, it is necessary to address the source of the moisture and allow the subfloor to dry out before continuing with installation.
Common issues arising from poorly prepared subfloors include uneven flooring, excessive noise, and premature wear. By meticulously inspecting, cleaning, leveling, and moisture testing the subfloor, these problems can be avoided, ensuring a smooth installation process and a long-lasting wooden floor.
```htmlInstallation Techniques
When installing wooden flooring, selecting the appropriate method is crucial for ensuring durability and aesthetic appeal. Three primary installation techniques are commonly used: nail-down, glue-down, and floating floor methods. Each has its unique advantages and specific requirements.
Nail-Down Method
The nail-down method is often preferred for solid hardwood flooring. Begin by laying a vapor barrier and underlayment on the subfloor. Align the first plank along the longest wall, ensuring it is straight. Use a pneumatic floor nailer to secure the plank, leaving a 1/2-inch expansion gap between the plank and the wall. Continue laying planks row by row, ensuring tight seams and consistent alignment. Essential tools include a floor nailer, mallet, and spacer wedges.
Glue-Down Method
This technique is suitable for engineered wood flooring and works well over concrete subfloors. Clean the subfloor thoroughly and apply the adhesive using a trowel. Lay the first plank along the guideline, pressing it firmly into the adhesive. Use spacers to maintain a consistent expansion gap. Install subsequent planks by fitting the tongue into the groove of the previous plank, pressing down to secure. Regularly check alignment and remove excess adhesive immediately. Necessary materials include adhesive, a trowel, and spacers.
Floating Floor Method
The floating floor method is ideal for laminate and some engineered wood flooring types. This method does not require nails or glue. Begin by laying a moisture barrier and underlayment. Click the first plank into place, ensuring it is straight. Subsequent planks are connected by aligning the tongue and groove and tapping them together. Maintain an expansion gap around the perimeter. This method requires a tapping block, pull bar, and spacers.
Regardless of the installation method, proper alignment and spacing are critical. Measure and cut planks carefully to fit around obstacles like doorways and vents. Regularly check for levelness and secure planks firmly to prevent future issues such as warping or gaps. By following these installation techniques meticulously, you can achieve a long-lasting and visually appealing wooden floor.
Initial Care and Conditioning
After the installation of wooden flooring, the initial care and conditioning are crucial to ensure its longevity and durability. One essential step is acclimating the wood to its environment. Wood is a natural material that reacts to changes in temperature and humidity. Allowing the newly installed wooden flooring to adjust to the room's conditions helps prevent warping or gapping over time. Typically, it is advisable to let the wood acclimate for at least 48 to 72 hours. During this period, maintaining a consistent indoor climate is beneficial.
The initial cleaning process is another critical component of caring for your wooden floor. Post-installation, it is common to find dust and debris on the surface. A gentle, thorough cleaning is needed to remove these particles without damaging the wood. Start with a soft-bristle broom or a vacuum equipped with a floor-brush attachment to eliminate loose dirt. Follow up with a damp, not wet, microfiber mop to clean the surface. Avoid excessive water usage, as moisture can seep into the wood and cause damage.
Applying protective finishes is also part of the initial care routine. These finishes serve as a barrier against spills, stains, and wear. There are various types of finishes available, including oil-based, water-based, and polyurethane. Each type offers different levels of protection and aesthetic appeal. It is essential to follow the manufacturer's instructions for application to ensure optimal results. Generally, applying multiple thin coats is better than one thick layer, as it provides a more even and durable protection.
During the first few weeks post-installation, certain precautions can help avoid common pitfalls. For instance, placing protective pads under furniture legs can prevent scratches and dents. Additionally, maintaining a stable indoor environment with controlled humidity levels can prevent the wood from expanding or contracting excessively. It is also advisable to avoid wearing high heels or dragging heavy objects across the floor to prevent surface damage.
Routine Maintenance
Maintaining wooden flooring in top condition requires a consistent and thorough routine. Daily upkeep is fundamental and involves sweeping or vacuuming to remove dirt and debris that can scratch the surface. A soft-bristled broom or a vacuum with a hardwood floor attachment is recommended to avoid causing damage.
Weekly cleaning should include a more in-depth approach. Use a damp mop with a pH-neutral wood floor cleaner specifically designed for hardwood flooring. Avoid excessive water as it can seep into the wood and cause warping. Instead, lightly mist the mop or use a well-wrung cloth to ensure minimal moisture contact.
Monthly maintenance can help to address the buildup of grime and restore the wood's natural shine. Consider using a quality wood polish or wax designed for wooden floors. Apply it as per the manufacturer's instructions to rejuvenate the flooring and provide an additional layer of protection against wear and tear.
For minor scratches and scuffs, a wood floor repair kit can be very effective. These kits typically include touch-up markers, wax sticks, and putty that match various wood finishes. Gently rub the scratch with the marker or fill it with the wax stick, then buff it out with a soft cloth to blend it with the surrounding area.
Preventive measures are equally important to maintain wooden flooring. Place protective pads under furniture legs to prevent indentations and scratches. Use area rugs or runners in high-traffic zones to minimize wear. Trim pets' nails regularly to avoid scratches on the surface, and clean up spills immediately to prevent staining and water damage.
By adhering to these routine maintenance practices, wooden flooring can remain aesthetically pleasing and structurally sound for many years. Regular cleaning, addressing minor damage promptly, and taking preventive steps can significantly extend the life and beauty of wooden floors.
Long-Term Care and Refinishing
Wooden flooring, while durable and elegant, will inevitably show signs of wear and tear over time. Refinishing is a comprehensive process that can restore the original beauty of your wooden floors and extend their lifespan. Knowing when and how to refinish your floors is crucial to maintaining their pristine condition.
Identifying the right time to refinish your wooden flooring is essential. Common signs indicating it's time for refinishing include deep scratches, noticeable discoloration, and water damage. If the finish appears dull and worn out, or if there are areas where the wood is exposed, these are clear signals that your floor needs attention.
The refinishing process typically involves three main steps: sanding, staining, and sealing. Sanding is the first and most critical step, as it removes the old finish and smooths out imperfections. It's important to use the right grit of sandpaper and to sand evenly to avoid creating dips and uneven surfaces. Once the floor is thoroughly sanded, it should be cleaned to remove all dust and debris.
Staining is optional but recommended if you want to enhance the color or change the appearance of your wooden flooring. When applying the stain, ensure even coverage and allow adequate drying time. Finally, sealing the floor is crucial as it provides a protective layer against wear and tear. Polyurethane is a popular choice for its durability and ease of application. Multiple coats may be necessary, with each coat requiring sufficient drying time.
To extend the intervals between refinishing projects, regular maintenance is key. Use protective pads under furniture, promptly clean up spills, and consider area rugs in high-traffic zones. Regular sweeping and mopping with a damp, not wet, cloth will also help maintain the floor's finish. Avoid using harsh chemicals or abrasive cleaners, as they can damage the wood.
By following these guidelines, you can ensure that your wooden flooring remains a stunning feature of your home for many years to come.
Installation and Maintenance Tips for Long-Lasting Wooden Flooring
Wooden flooring is a beautiful and timeless addition to any home. To ensure it remains in excellent condition for years to come, proper installation and maintenance are crucial. Here are some essential tips for both aspects:
### Installation Tips
#### 1. Acclimate the Wood
Tip: Before installation, allow the wood to acclimate to the room’s temperature and humidity for at least 48-72 hours. This helps prevent future expansion or contraction.
#### 2. Prepare the Subfloor
Tip: Ensure the subfloor is clean, dry, and level. Any moisture or unevenness can cause the wood to warp or buckle over time. Use a moisture barrier if installing over concrete.
#### 3. Leave Expansion Gaps
Tip: Wood expands and contracts with changes in humidity. Leave an expansion gap of around 10-15mm around the perimeter of the room to accommodate this movement. Use spacers during installation to maintain this gap.
#### 4. Use the Right Adhesive or Fasteners
Tip: Follow the manufacturer’s recommendations for adhesives or fasteners. For engineered wood, glue or click-lock systems are common, while solid hardwood might require nails or staples.
#### 5. Stagger the Planks
Tip: Stagger the end joints of the planks by at least 6 inches to create a more stable and visually appealing floor. Avoid creating an H-pattern or other repeating patterns.
#### 6. Professional Installation
Tip: If you’re not confident in your DIY skills, hire a professional installer. Proper installation is key to the longevity of your wooden flooring.
### Maintenance Tips
#### 1. Regular Cleaning
Tip: Sweep or vacuum your wooden floor regularly to remove dirt and debris that can cause scratches. Use a vacuum with a soft brush attachment to avoid damage.
#### 2. Use the Right Cleaning Products
Tip: Use cleaning products specifically designed for wooden floors. Avoid using water and vinegar, soap-based cleaners, wax, or steam cleaners, as they can damage the finish.
#### 3. Control Humidity Levels
Tip: Maintain indoor humidity levels between 30% and 50% to prevent the wood from expanding or contracting excessively. Use a humidifier in dry seasons and a dehumidifier in humid seasons.
#### 4. Protect from Furniture
Tip: Place felt pads under furniture legs to prevent scratches and dents. When moving furniture, lift it instead of dragging it across the floor.
#### 5. Address Spills Immediately
Tip: Wipe up spills as soon as they occur to prevent water damage. Use a dry or slightly damp cloth and avoid letting liquids sit on the surface.
#### 6. Use Rugs and Mats
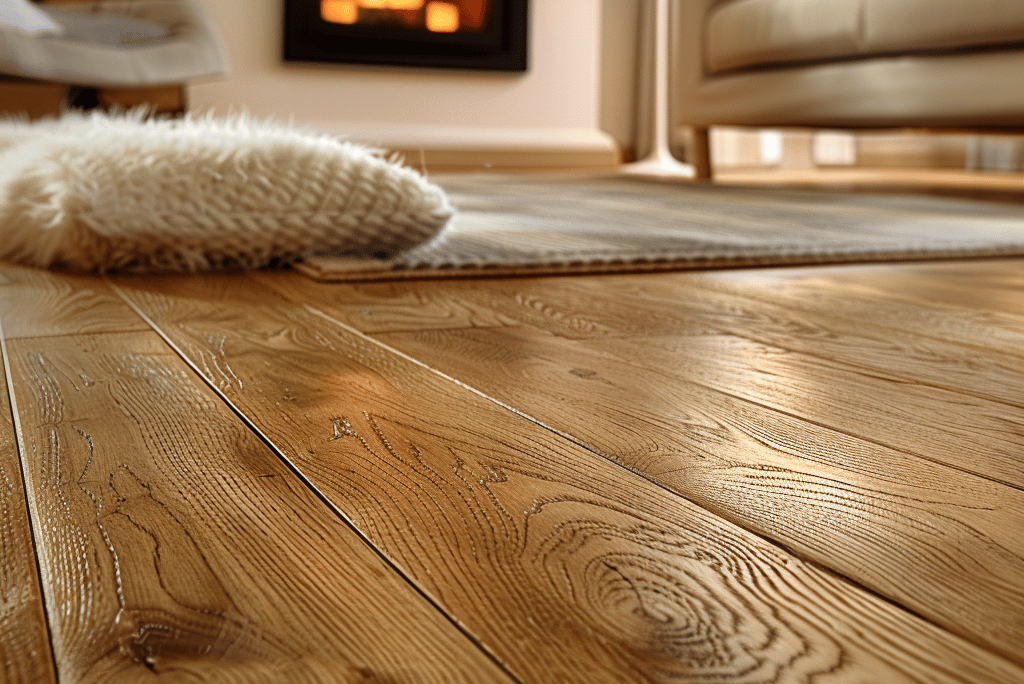
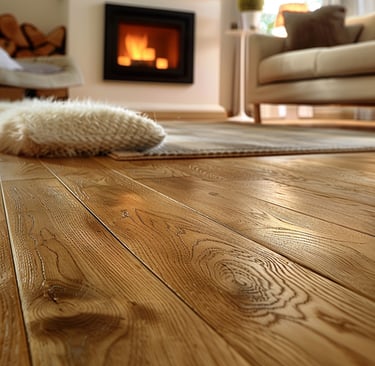
Tip: Place doormats at entrances to reduce dirt and moisture tracked in from outside. Use area rugs in high-traffic areas to protect the floor from wear and tear.
#### 7. Refinish When Necessary
Tip: Over time, wooden floors may develop scratches and lose their luster. Depending on the type of wood and finish, you may need to sand and refinish the floor every 5-10 years to restore its appearance.
#### 8. Avoid High Heels and Pet Nails
Tip: High heels and pet nails can cause significant damage to wooden floors. Encourage guests to remove shoes, and keep pet nails trimmed to prevent scratches.
By following these installation and maintenance tips, you can ensure that your wooden flooring remains beautiful and durable for many years. Proper care and attention to detail during installation and regular upkeep will protect your investment and enhance the charm and warmth of your home.
FLOORS2DECORS@GMAIL.COM
+91 73311 77735